

How To Fix Distortion In Photoshop
3 means to gear up perspective errors in Photoshop
Some mutual issues you will encounter when photographing buildings is a combination of perspective errors and barrel distortion from the camera. Fortunately this is easy to set. All it takes is some fourth dimension and patience.
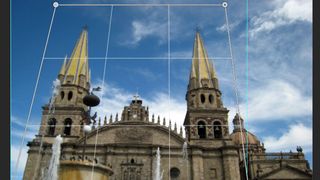
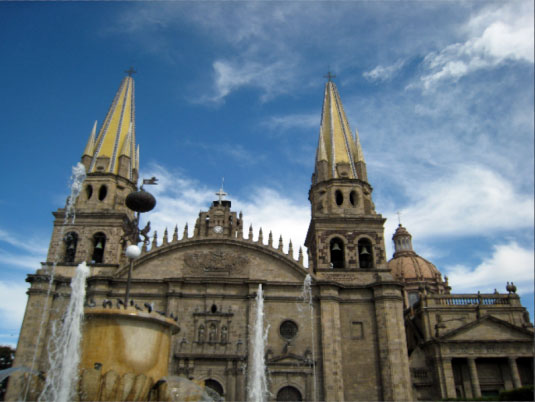
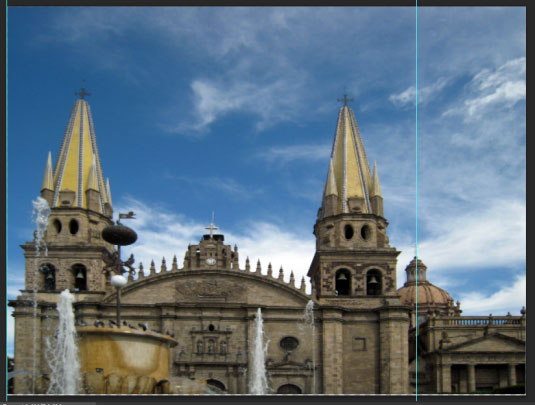
Outset off, we volition look at an image with a combination barrel baloney and perspective errors.
The simplest style to gear up the barrel distortion is to make use of the Lens Correction filter which accesses profiles of different cameras and will apply that contour to the epitome you lot take.
After that, nosotros will fix the perspective distortion. To get started, go to Filter>Lens Correction.
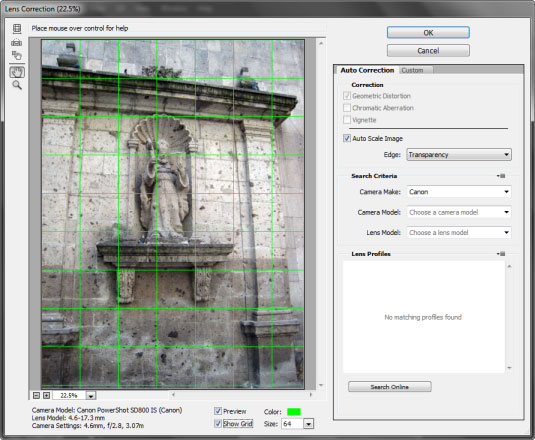
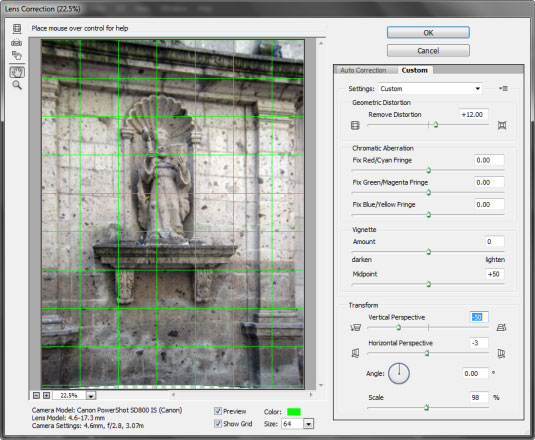
In the Lens Correction dialog box yous encounter a preview of your image before any correction has been applied. Directly below the prototype is of import information about the make and model of camera you used, equally well as the type of lens model.
This information tin exist used to load the camera contour to correct the barrel distortion. You will notice ii options: Preview and Bear witness Grid. Enable both and set the grid color to something which is piece of cake to see against the image. Yous can leave the size at the default of 64.
On the far correct panel there are 2 tabs: Auto Correction and Custom. At the top, you volition discover that the Correction department has Geometric Baloney enabled merely the entire section is grayed out.
Direct beneath that, the Car Calibration Image checkbox is enabled past default, as is Transparency adjacent to the Edge option. Below that you volition meet a tiny box next to Search Criteria. When y'all click on the box you have a selection of Match Paradigm Sensor Size and Prefer RAW Profiles.
Since my camera doesn't back up Camera RAW, Lucifer Sensor Prototype Size is enabled. Below that is the camera settings where you select the camera make, model and lens model. If yours isn't listed, you take two options, to search the lens profiles or to click on the Search online button at the bottom.
When I went through the built-in listing, in that location was no contour for my camera, so I clicked on the Search Online button to find my camera contour. Unfortunately I couldn't find 1, which is probably due to the age of my camera. Fortunately there is another choice, the Custom tab where yous remove butt distortion and perspective errors manually.
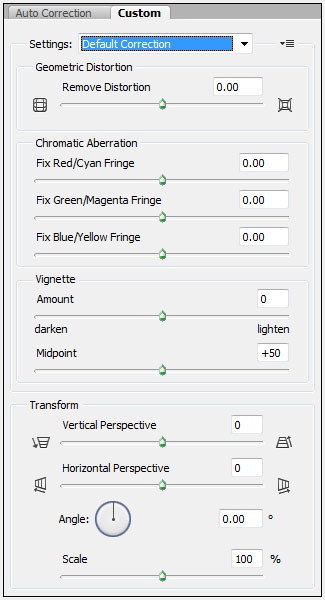
Every bit you can see, there are many options hither, but nosotros will merely use a few of them, which are the Remove Baloney and the Transform controls.
To get started utilize Settings>Default Correction. To the right of that setting is a small-scale popular-upward box where you lot can load or salvage settings. Now it's time to remove the baloney and fix the leaning of the building. This is where the grid we added to the image comes into play.
Information technology will help determine when the barrel baloney has been removed. After that, you tin can correct the perspective of the building. You will probably observe that y'all will need to go back and along betwixt the settings because every bit you correct the perspective, this will likewise touch the barrel baloney.
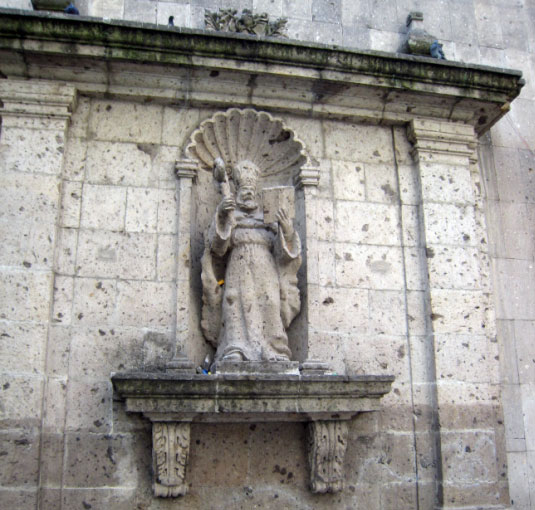
Here is the result in the dialog box. As you can see, this is a fast and easy style to correct barrel baloney and perspective errors.
Perspective Warp
Adobe has introduced Perspective Warp in Photoshop CC to fix the problem of perspective errors when photographing buildings.
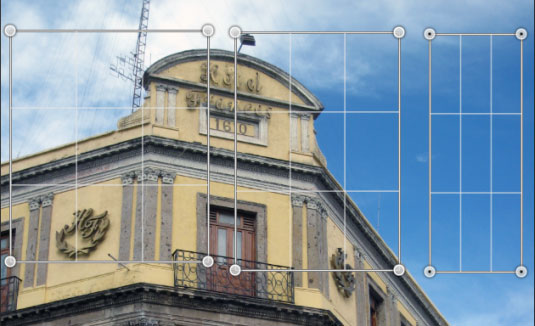
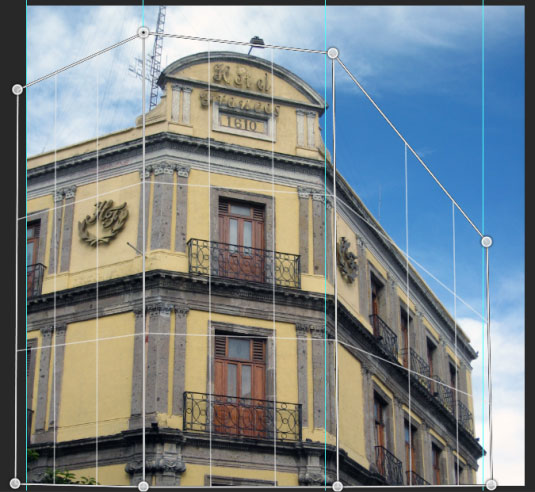
Here is an example of a edifice with perspective issues.
To fix the perspective, go to Edit>Perspective Warp. When you do so, the cursor becomes a different icon. When you click in the epitome, information technology creates a grid made up of 9 sections.
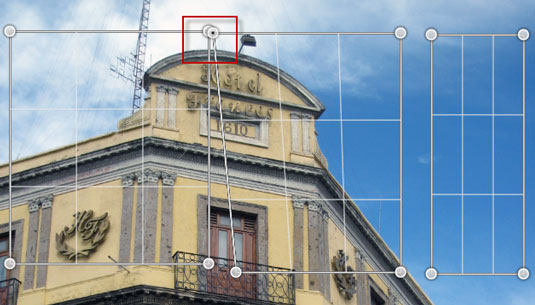
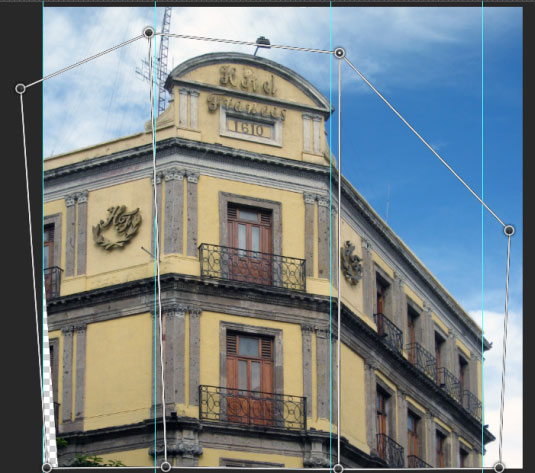
Manipulate the control points of the grid (on each corner) and draw the grid and then what information technology encases the entire building. In one case you finish that, go to the card bar and click on the Warp button.
The filigree will vanish and the command pins will become active, assuasive you to drag them and straighten the building. For extra accuracy, use guidelines (as in the screen shot above).
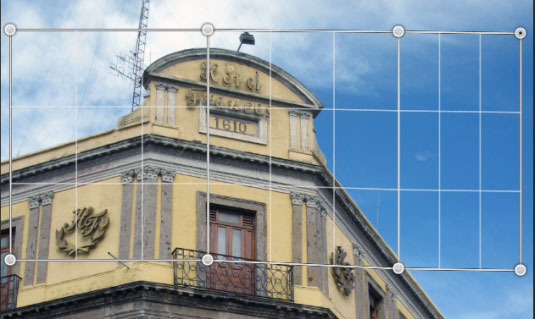
When you lot are satisfied with your changes, click on the checkmark icon in the menu bar.
Photoshop volition apply your changes to the prototype.
Multiple issues

Sometimes you lot volition have an paradigm with multiple perspective problems like the one higher up. You will still use the Perspective Warp tool but more than control pins volition be involved.
To brand this work, you volition need to draw out three quad shapes as above.
Adjacent, pick one corner control pin and move it and so it overlaps the control pin of some other quad shape. The shapes will highlight. When you lot release the mouse push, the two quad shapes volition snap together as one.
Repeat this process with the third quad shape and all three will be joined together. Now you are ready to gear up the perspective.
The command points are in position, forth with guidelines to meliorate the accurateness.
With an paradigm of this type, correcting the perspective tin can be a bit tricky. The guidelines help a lot with that, though. As you move the mouse to drag the control pins you might find they move too much.
If that's the example, make sure the control pivot is active, and so use the arrow keys on your keyboard for precise positioning.
Once you are satisfied with your adjustments, click on the checkmark in the menu bar to apply the changes. Y'all might demand to crop the image subsequently.
Decision
Yous at present know of several ways to fix barrel baloney and/or perspective errors. If necessary, y'all might have to combine techniques to get the results you seek.
Words: Nathan Segal
Related articles
Source: https://www.creativebloq.com/adobe/3-ways-fix-perspective-errors-photoshop-71412122
Posted by: lewiskingince.blogspot.com
0 Response to "How To Fix Distortion In Photoshop"
Post a Comment